Tune your config
Browse the Configuration reference to set welcome message, user limits, retention, and more.
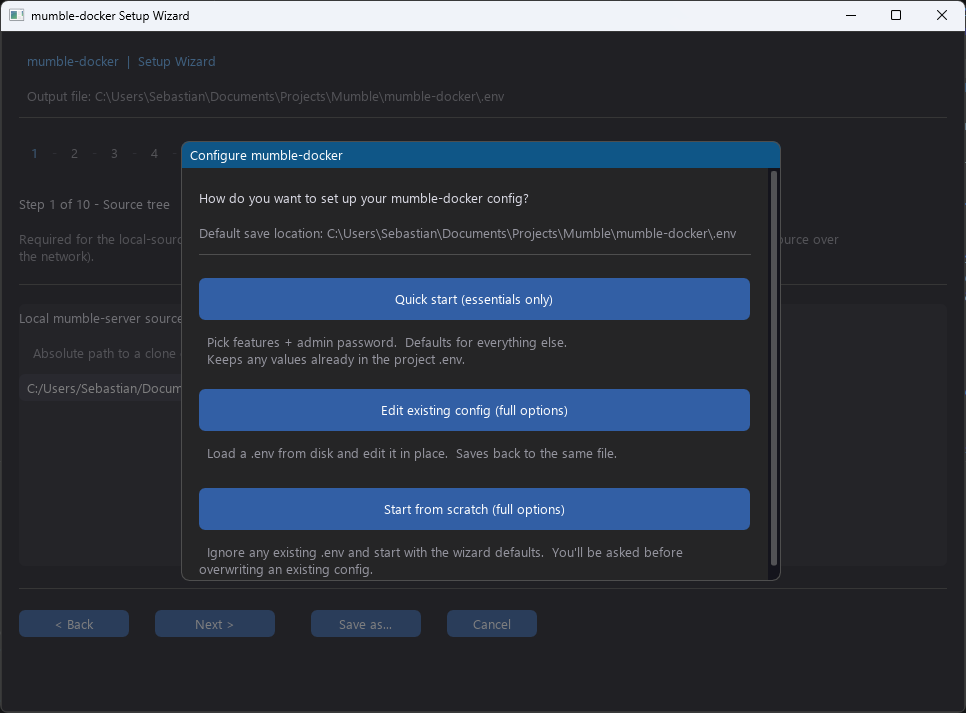
If you prefer “click Next a few times” over “edit YAML”, the setup
wizard walks you through every value in your .env file. It comes
in two flavours:
Python 3.8 or newer on the machine running the wizard.
The Fancy Mumble Docker repository checked out locally:
git clone https://github.com/Fancy-Mumble/mumble-dockercd mumble-dockerpython -m setup_wizardInstall the GUI dependency once:
python -m pip install -r setup_wizard/requirements.txtThen launch:
python -m setup_wizard --guiYou can also invoke through the tools entry point:
python -m tools setup # terminalpython -m tools setup --gui # graphicalThe wizard is a multi-step form. Each step is validated before you can move on.
Source tree. Point the wizard at your local server source checkout, or click Clone to let the wizard download it for you.
Image and container names. Pick the Docker image tag and the container name. Defaults are fine for most.
Ports. Confirm the ports for voice (64738), the file server (64739), the live-doc WebSocket (64740), and the screen-share relay (10000). Change them if you need to run two servers on the same machine.
Runtime user. The UID and GID the server runs as inside the container. Default is 10000:10000. Change to match the owner of your data volume if you bind-mount a host folder.
SuperUser password. Either type one, click Generate for a strong random one, or leave blank. If you leave it blank, the server will print a random password to the log on the first start.
Optional file mounts. Bind-mount a custom config file, a Firebase credentials JSON, or extra plugin libraries.
Firebase push credentials. If you want push notifications,
point the wizard at your service-account JSON. It will base64
encode the file into the .env so credentials never live on a
bind-mounted host path.
When you click Save .env on the last step, the wizard writes
.env next to your docker-compose.yml. You can review the file by
hand if you want.
You can re-run the wizard later to change one value without redoing
all the others. The wizard reads the existing .env and pre-fills
every prompt with the current value.
python -m setup_wizardWith the .env written, start the container:
docker compose up -dOr, if you want to rebuild the image locally first (for example because you changed the source tree):
python -m tools dev-buildIf you left the password blank, find the auto-generated one with:
docker logs mumble-server 2>&1 | grep -i superuserOr set a new one at any time:
docker exec mumble-server mumble-server \ --ini /data/mumble_server_config.ini \ --set-su-pw "your-strong-password"A typical .env looks like this:
# ImageMUMBLE_IMAGE=ghcr.io/fancy-mumble/mumble-server:latestCONTAINER_NAME=mumble-server
# PortsMUMBLE_PORT=64738MUMBLE_FILE_PORT=64739MUMBLE_SFU_PORT=10000
# RuntimePUID=10000PGID=10000
# Server identityMUMBLE_SUPERUSER_PASSWORD=...
# Push (optional, set to enable)MUMBLE_FCM_CREDENTIALS_BASE64=...
Every other server option can be added as a MUMBLE_CONFIG_* entry,
see the Configuration reference.
Tune your config
Browse the Configuration reference to set welcome message, user limits, retention, and more.
Enable features
Walk through the Feature deep-dives to turn on push, the screen-share relay, and link previews.
Set up the admin
Take ownership with SuperUser & first login.